首页 > Spring Cloud
阅读:52255
OpenFeign:Spring Cloud声明式服务调用组件(非常详细)
Netflix Feign 是 Netflix 公司发布的一种实现负载均衡和服务调用的开源组件。Spring Cloud 将其与 Netflix 中的其他开源服务组件(例如 Eureka、Ribbon 以及 Hystrix 等)一起整合进 Spring Cloud Netflix 模块中,整合后全称为 Spring Cloud Netflix Feign。
Feign 对 Ribbon 进行了集成,利用 Ribbon 维护了一份可用服务清单,并通过 Ribbon 实现了客户端的负载均衡。
Feign 是一种声明式服务调用组件,它在 RestTemplate 的基础上做了进一步的封装。通过 Feign,我们只需要声明一个接口并通过注解进行简单的配置(类似于 Dao 接口上面的 Mapper 注解一样)即可实现对 HTTP 接口的绑定。
通过 Feign,我们可以像调用本地方法一样来调用远程服务,而完全感觉不到这是在进行远程调用。
Feign 支持多种注解,例如 Feign 自带的注解以及 JAX-RS 注解等,但遗憾的是 Feign 本身并不支持 Spring MVC 注解,这无疑会给广大 Spring 用户带来不便。
2019 年 Netflix 公司宣布 Feign 组件正式进入停更维护状态,于是 Spring 官方便推出了一个名为 OpenFeign 的组件作为 Feign 的替代方案。
OpenFeign 是 Spring Cloud 对 Feign 的二次封装,它具有 Feign 的所有功能,并在 Feign 的基础上增加了对 Spring MVC 注解的支持,例如 @RequestMapping、@GetMapping 和 @PostMapping 等。
1. 在 spring-cloud-demo2 下创建一个名为 micro-service-cloud-consumer-dept-feign 的 Spring Boot 模块,并在 pom.xml 中添加以下依赖。
2. 在 micro-service-cloud-consumer-dept-feign 下的类路径(即 /resources 目录)下,添加一个 application.yml,配置内容如下。
3. 在 net.biancheng.c.service 包下创建一个名为 DeptFeignService 的接口,并在该接口上使用 @FeignClient 注解实现对服务接口的绑定,代码如下。
在编写服务绑定接口时,需要注意以下 2 点:
4. 在 net.biancheng.c.controller 包下,创建一个名为 DeptController_Consumer 的 Controller 类,代码如下。
5. 在主启动类上添加 @EnableFeignClients 注解开启 OpenFeign 功能,代码如下。
Spring Cloud 应用在启动时,OpenFeign 会扫描标有 @FeignClient 注解的接口生成代理,并注人到 Spring 容器中。
6. 依次启动服务注册中心集群、服务提供者以及 micro-service-cloud-consumer-dept-feign,启动完成后,使用浏览器访问“http://eureka7001.com/consumer/dept/list”,结果如下图。
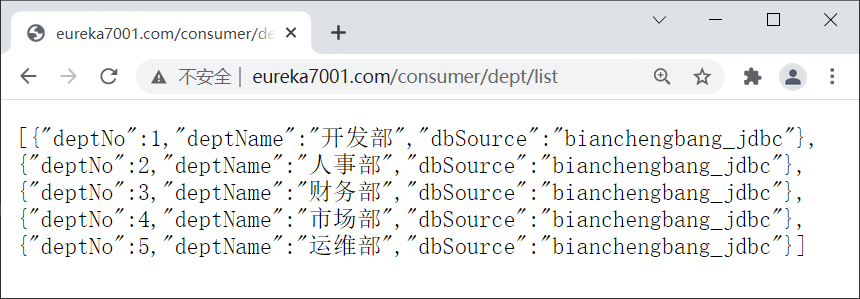
图1:OpenFeign 实现远程服务调用
7. 连续多次访问“http://eureka7001.com/consumer/dept/list”,结果如下图。
图2:OpenFeign 负载均衡
从图 2 可以看出,由于 OpenFeign 集成了 Ribbon,因此它也实现了客户端的负载均衡,其默认负载均衡策略为轮询策略。
下面我们就通过一个实例,来演示 OpenFeign 是如何进行超时控制的。
1. 在所有的服务提供者(服务端)的 DeptController 中添加一个响应时间为 5 秒的服务,代码如下。
2. 在 micro-service-cloud-consumer-dept-feign 的 DeptFeignService 接口中添加以下代码,绑定服务端刚刚添加的超时服务。
3. 在 micro-service-cloud-consumer-dept-feign 的 DeptController_Consumer 添加以下代码。
4. 重启所有服务提供者,使用浏览器依次访问“http://eureka7001.com:8001/dept/feign/timeout”、“http://eureka7001.com:8002/dept/feign/timeout”和“http://eureka7001.com:8003/dept/feign/timeout”,确保所有服务提供者提供的超时服务都能正常使用,如下图。
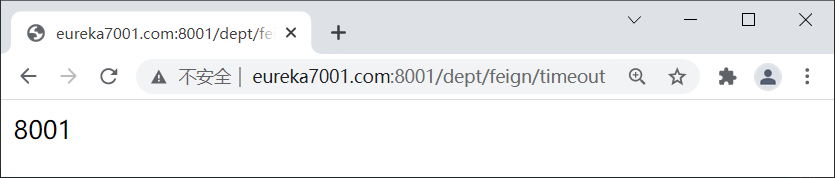
图3:服务提供者的超时服务
5. 重启 micro-service-cloud-consumer-dept-feign,使用浏览器访问“http://eureka7001.com/consumer/dept/feign/timeout”,结果如下图。
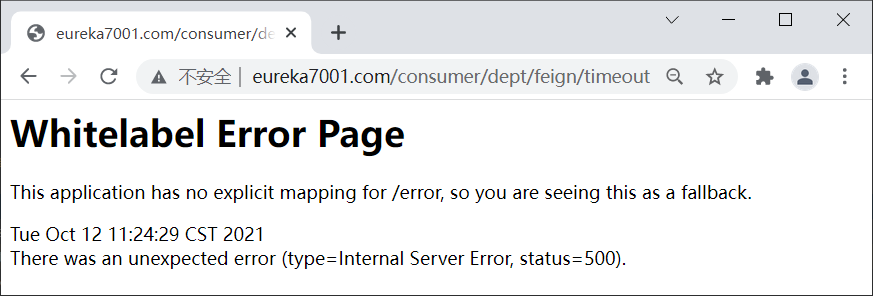
图4:OpenFeign 超时报错
6. 在 micro-service-cloud-consumer-dept-feign 的 application.yml 中添加以下配置,将超时时间设置为 6 秒。

图5:OpenFeign 超时控制
Feign 为每一个 FeignClient 都提供了一个 feign.Logger 实例,通过它可以对 OpenFeign 服务绑定接口的调用情况进行监控。
OpenFeign 日志打印功能的开启方式比较简单,下面我们就通过一个实例进行演示。
1. 在 micro-service-cloud-consumer-dept-feign 的 application.yml 中配置以下内容。
以上配置说明如下:
以上配置的含义就是,OpenFeign 以 debug 级别监控 net.biancheng.c.service.DeptFeignService 接口。
2. 在 net.biancheng.c. config 包下创建一个名为 ConfigBean 的配置类,代码如下。
该配置的作用是通过配置的 Logger.Level 对象告诉 OpenFeign 记录哪些日志内容。
Logger.Level 的具体级别如下:
3. 重启 micro-service-cloud-consumer-dept-feign,使用浏览器访问“http://eureka7001.com/consumer/dept/list”,控制台输出如下。
Feign 对 Ribbon 进行了集成,利用 Ribbon 维护了一份可用服务清单,并通过 Ribbon 实现了客户端的负载均衡。
Feign 是一种声明式服务调用组件,它在 RestTemplate 的基础上做了进一步的封装。通过 Feign,我们只需要声明一个接口并通过注解进行简单的配置(类似于 Dao 接口上面的 Mapper 注解一样)即可实现对 HTTP 接口的绑定。
通过 Feign,我们可以像调用本地方法一样来调用远程服务,而完全感觉不到这是在进行远程调用。
Feign 支持多种注解,例如 Feign 自带的注解以及 JAX-RS 注解等,但遗憾的是 Feign 本身并不支持 Spring MVC 注解,这无疑会给广大 Spring 用户带来不便。
2019 年 Netflix 公司宣布 Feign 组件正式进入停更维护状态,于是 Spring 官方便推出了一个名为 OpenFeign 的组件作为 Feign 的替代方案。
OpenFeign
OpenFeign 全称 Spring Cloud OpenFeign,它是 Spring 官方推出的一种声明式服务调用与负载均衡组件,它的出现就是为了替代进入停更维护状态的 Feign。OpenFeign 是 Spring Cloud 对 Feign 的二次封装,它具有 Feign 的所有功能,并在 Feign 的基础上增加了对 Spring MVC 注解的支持,例如 @RequestMapping、@GetMapping 和 @PostMapping 等。
OpenFeign 常用注解
使用 OpenFegin 进行远程服务调用时,常用注解如下表。| 注解 | 说明 |
|---|---|
| @FeignClient | 该注解用于通知 OpenFeign 组件对 @RequestMapping 注解下的接口进行解析,并通过动态代理的方式产生实现类,实现负载均衡和服务调用。 |
| @EnableFeignClients | 该注解用于开启 OpenFeign 功能,当 Spring Cloud 应用启动时,OpenFeign 会扫描标有 @FeignClient 注解的接口,生成代理并注册到 Spring 容器中。 |
| @RequestMapping | Spring MVC 注解,在 Spring MVC 中使用该注解映射请求,通过它来指定控制器(Controller)可以处理哪些 URL 请求,相当于 Servlet 中 web.xml 的配置。 |
| @GetMapping | Spring MVC 注解,用来映射 GET 请求,它是一个组合注解,相当于 @RequestMapping(method = RequestMethod.GET) 。 |
| @PostMapping | Spring MVC 注解,用来映射 POST 请求,它是一个组合注解,相当于 @RequestMapping(method = RequestMethod.POST) 。 |
Spring Cloud Finchley 及以上版本一般使用 OpenFeign 作为其服务调用组件。由于 OpenFeign 是在 2019 年 Feign 停更进入维护后推出的,因此大多数 2019 年及以后的新项目使用的都是 OpenFeign,而 2018 年以前的项目一般使用 Feign。
Feign VS OpenFeign
下面我们就来对比下 Feign 和 OpenFeign 的异同。相同点
Feign 和 OpenFegin 具有以下相同点:- Feign 和 OpenFeign 都是 Spring Cloud 下的远程调用和负载均衡组件。
- Feign 和 OpenFeign 作用一样,都可以实现服务的远程调用和负载均衡。
- Feign 和 OpenFeign 都对 Ribbon 进行了集成,都利用 Ribbon 维护了可用服务清单,并通过 Ribbon 实现了客户端的负载均衡。
- Feign 和 OpenFeign 都是在服务消费者(客户端)定义服务绑定接口并通过注解的方式进行配置,以实现远程服务的调用。
不同点
Feign 和 OpenFeign 具有以下不同:- Feign 和 OpenFeign 的依赖项不同,Feign 的依赖为 spring-cloud-starter-feign,而 OpenFeign 的依赖为 spring-cloud-starter-openfeign。
- Feign 和 OpenFeign 支持的注解不同,Feign 支持 Feign 注解和 JAX-RS 注解,但不支持 Spring MVC 注解;OpenFeign 除了支持 Feign 注解和 JAX-RS 注解外,还支持 Spring MVC 注解。
OpenFeign 实现远程服务调用
下面我们就通过一个实例,来演示下通过 OpenFeign 是如何实现远程服务调用的。1. 在 spring-cloud-demo2 下创建一个名为 micro-service-cloud-consumer-dept-feign 的 Spring Boot 模块,并在 pom.xml 中添加以下依赖。
<?xml version="1.0" encoding="UTF-8"?>
<project xmlns="http://maven.apache.org/POM/4.0.0" xmlns:xsi="http://www.w3.org/2001/XMLSchema-instance"
         xsi:schemaLocation="http://maven.apache.org/POM/4.0.0 https://maven.apache.org/xsd/maven-4.0.0.xsd">
    <modelVersion>4.0.0</modelVersion>
    <parent>
        <artifactId>spring-cloud-demo2</artifactId>
        <groupId>net.biancheng.c</groupId>
        <version>0.0.1-SNAPSHOT</version>
    </parent>

    <groupId>net.biancheng.c</groupId>
    <artifactId>micro-service-cloud-consumer-dept-feign</artifactId>
    <version>0.0.1-SNAPSHOT</version>
    <name>micro-service-cloud-consumer-dept-feign</name>
    <description>Demo project for Spring Boot</description>
    <properties>
        <java.version>1.8</java.version>
    </properties>
    <dependencies>
        <dependency>
            <groupId>net.biancheng.c</groupId>
            <artifactId>micro-service-cloud-api</artifactId>
            <version>${project.version}</version>
        </dependency>
        <dependency>
            <groupId>org.springframework.boot</groupId>
            <artifactId>spring-boot-starter-web</artifactId>
        </dependency>
        <dependency>
            <groupId>org.projectlombok</groupId>
            <artifactId>lombok</artifactId>
            <optional>true</optional>
        </dependency>
        <dependency>
            <groupId>org.springframework.boot</groupId>
            <artifactId>spring-boot-starter-test</artifactId>
            <scope>test</scope>
        </dependency>
        <!--Eureka Client 依赖-->
        <dependency>
            <groupId>org.springframework.cloud</groupId>
            <artifactId>spring-cloud-starter-netflix-eureka-client</artifactId>
        </dependency>
        <!-- Ribbon 依赖-->
        <dependency>
            <groupId>org.springframework.cloud</groupId>
            <artifactId>spring-cloud-starter-netflix-ribbon</artifactId>
        </dependency>
        <!--添加 OpenFeign 依赖-->
        <dependency>
            <groupId>org.springframework.cloud</groupId>
            <artifactId>spring-cloud-starter-openfeign</artifactId>
        </dependency>
    </dependencies>

    <build>
        <plugins>
            <plugin>
                <groupId>org.springframework.boot</groupId>
                <artifactId>spring-boot-maven-plugin</artifactId>
                <configuration>
                    <excludes>
                        <exclude>
                            <groupId>org.projectlombok</groupId>
                            <artifactId>lombok</artifactId>
                        </exclude>
                    </excludes>
                </configuration>
            </plugin>
        </plugins>
    </build>
</project>
2. 在 micro-service-cloud-consumer-dept-feign 下的类路径(即 /resources 目录)下,添加一个 application.yml,配置内容如下。
server:
  port: 80

eureka:
  client:
    register-with-eureka: false #服务消费者可以不向服务注册中心注册服务
    service-url:
      defaultZone: http://eureka7001.com:7001/eureka/,http://eureka7002.com:7002/eureka/,http://eureka7003.com:7003/eureka/
    fetch-registry: true  #服务消费者客户端需要去检索服务
3. 在 net.biancheng.c.service 包下创建一个名为 DeptFeignService 的接口,并在该接口上使用 @FeignClient 注解实现对服务接口的绑定,代码如下。
package net.biancheng.c.service;

import net.biancheng.c.entity.Dept;
import org.springframework.cloud.openfeign.FeignClient;
import org.springframework.stereotype.Component;
import org.springframework.web.bind.annotation.PathVariable;
import org.springframework.web.bind.annotation.RequestMapping;
import org.springframework.web.bind.annotation.RequestMethod;

import java.util.List;

//添加为容器内的一个组件
@Component
// 服务提供者提供的服务名称,即 application.name
@FeignClient(value = "MICROSERVICECLOUDPROVIDERDEPT")
public interface DeptFeignService {
    //对应服务提供者(8001、8002、8003)Controller 中定义的方法
    @RequestMapping(value = "/dept/get/{id}", method = RequestMethod.GET)
    public Dept get(@PathVariable("id") int id);

    @RequestMapping(value = "/dept/list", method = RequestMethod.GET)
    public List<Dept> list();
}
在编写服务绑定接口时,需要注意以下 2 点:
- 在 @FeignClient 注解中,value 属性的取值为:服务提供者的服务名,即服务提供者配置文件(application.yml)中 spring.application.name 的取值。
- 接口中定义的每个方法都与服务提供者(即 micro-service-cloud-provider-dept-8001 等)中 Controller 定义的服务方法对应。
4. 在 net.biancheng.c.controller 包下,创建一个名为 DeptController_Consumer 的 Controller 类,代码如下。
package net.biancheng.c.controller;

import net.biancheng.c.entity.Dept;
import net.biancheng.c.service.DeptFeignService;
import org.springframework.web.bind.annotation.PathVariable;
import org.springframework.web.bind.annotation.RequestMapping;
import org.springframework.web.bind.annotation.RestController;

import javax.annotation.Resource;
import java.util.List;

@RestController
public class DeptController_Consumer {

    @Resource
    private DeptFeignService deptFeignService;

    @RequestMapping(value = "/consumer/dept/get/{id}")
    public Dept get(@PathVariable("id") Integer id) {
        return deptFeignService.get(id);
    }

    @RequestMapping(value = "/consumer/dept/list")
    public List<Dept> list() {
        return deptFeignService.list();
    }
}
5. 在主启动类上添加 @EnableFeignClients 注解开启 OpenFeign 功能,代码如下。
package net.biancheng.c;

import org.springframework.boot.SpringApplication;
import org.springframework.boot.autoconfigure.SpringBootApplication;
import org.springframework.cloud.openfeign.EnableFeignClients;

@SpringBootApplication
@EnableFeignClients //开启 OpenFeign 功能
public class MicroServiceCloudConsumerDeptFeignApplication {

    public static void main(String[] args) {
        SpringApplication.run(MicroServiceCloudConsumerDeptFeignApplication.class, args);
    }
}
Spring Cloud 应用在启动时,OpenFeign 会扫描标有 @FeignClient 注解的接口生成代理,并注人到 Spring 容器中。
6. 依次启动服务注册中心集群、服务提供者以及 micro-service-cloud-consumer-dept-feign,启动完成后,使用浏览器访问“http://eureka7001.com/consumer/dept/list”,结果如下图。
图1:OpenFeign 实现远程服务调用
7. 连续多次访问“http://eureka7001.com/consumer/dept/list”,结果如下图。
图2:OpenFeign 负载均衡
从图 2 可以看出,由于 OpenFeign 集成了 Ribbon,因此它也实现了客户端的负载均衡,其默认负载均衡策略为轮询策略。
OpenFeign 超时控制
OpenFeign 客户端的默认超时时间为 1 秒钟,如果服务端处理请求的时间超过 1 秒就会报错。为了避免这样的情况,我们需要对 OpenFeign 客户端的超时时间进行控制。下面我们就通过一个实例,来演示 OpenFeign 是如何进行超时控制的。
1. 在所有的服务提供者(服务端)的 DeptController 中添加一个响应时间为 5 秒的服务,代码如下。
//超时测试,该服务的响应时间为 5 秒
@RequestMapping(value = "/dept/feign/timeout")
public String DeptFeignTimeout() {
    //暂停 5 秒
    try {
        TimeUnit.SECONDS.sleep(5);
    } catch (InterruptedException e) {
        e.printStackTrace();
    }
    return serverPort;
}
2. 在 micro-service-cloud-consumer-dept-feign 的 DeptFeignService 接口中添加以下代码,绑定服务端刚刚添加的超时服务。
@RequestMapping(value = "/dept/feign/timeout")
public String DeptFeignTimeout();
3. 在 micro-service-cloud-consumer-dept-feign 的 DeptController_Consumer 添加以下代码。
@RequestMapping(value = "/consumer/dept/feign/timeout")
public String DeptFeignTimeout() {
    // openFeign-ribbon 客户端一般默认等待一秒钟,超过该时间就会报错
    return deptFeignService.DeptFeignTimeout();
}
4. 重启所有服务提供者,使用浏览器依次访问“http://eureka7001.com:8001/dept/feign/timeout”、“http://eureka7001.com:8002/dept/feign/timeout”和“http://eureka7001.com:8003/dept/feign/timeout”,确保所有服务提供者提供的超时服务都能正常使用,如下图。
图3:服务提供者的超时服务
5. 重启 micro-service-cloud-consumer-dept-feign,使用浏览器访问“http://eureka7001.com/consumer/dept/feign/timeout”,结果如下图。
图4:OpenFeign 超时报错
6. 在 micro-service-cloud-consumer-dept-feign 的 application.yml 中添加以下配置,将超时时间设置为 6 秒。
ribbon:
  ReadTimeout: 6000 #建立连接所用的时间,适用于网络状况正常的情况下,两端两端连接所用的时间
  ConnectionTimeout: 6000 #建立连接后,服务器读取到可用资源的时间
7. 再次重启 micro-service-cloud-consumer-dept-feign,使用浏览器访问“http://eureka7001.com/consumer/dept/feign/timeout”,结果如下图。注:由于 OpenFeign 集成了 Ribbon ,其服务调用以及负载均衡在底层都是依靠 Ribbon 实现的,因此 OpenFeign 超时控制也是通过 Ribbon 来实现的。
图5:OpenFeign 超时控制
OpenFeign 日志增强
OpenFeign 提供了日志打印功能,我们可以通过配置调整日志级别,来了解请求的细节。Feign 为每一个 FeignClient 都提供了一个 feign.Logger 实例,通过它可以对 OpenFeign 服务绑定接口的调用情况进行监控。
OpenFeign 日志打印功能的开启方式比较简单,下面我们就通过一个实例进行演示。
1. 在 micro-service-cloud-consumer-dept-feign 的 application.yml 中配置以下内容。
logging:
  level:
    #feign 日志以什么样的级别监控该接口
    net.biancheng.c.service.DeptFeignService: debug
以上配置说明如下:
- net.biancheng.c.service.DeptFeignService 是开启 @FeignClient 注解的接口(即服务绑定接口)的完整类名。也可以只配置部分路径,表示监控该路径下的所有服务绑定接口
- debug:表示监听该接口的日志级别。
以上配置的含义就是,OpenFeign 以 debug 级别监控 net.biancheng.c.service.DeptFeignService 接口。
2. 在 net.biancheng.c. config 包下创建一个名为 ConfigBean 的配置类,代码如下。
package net.biancheng.c.config;

import feign.Logger;
import org.springframework.context.annotation.Bean;
import org.springframework.context.annotation.Configuration;

@Configuration
public class ConfigBean {
    /**
     * OpenFeign 日志增强
     * 配置 OpenFeign 记录哪些内容
     */
    @Bean
    Logger.Level feginLoggerLevel() {
        return Logger.Level.FULL;
    }
}
该配置的作用是通过配置的 Logger.Level 对象告诉 OpenFeign 记录哪些日志内容。
Logger.Level 的具体级别如下:
- NONE:不记录任何信息。
- BASIC:仅记录请求方法、URL 以及响应状态码和执行时间。
- HEADERS:除了记录 BASIC 级别的信息外,还会记录请求和响应的头信息。
- FULL:记录所有请求与响应的明细,包括头信息、请求体、元数据等等。
3. 重启 micro-service-cloud-consumer-dept-feign,使用浏览器访问“http://eureka7001.com/consumer/dept/list”,控制台输出如下。
2021-10-12 14:33:07.408 DEBUG 13388 --- [p-nio-80-exec-2] n.biancheng.c.service.DeptFeignService   : [DeptFeignService#list] ---> GET http://MICROSERVICECLOUDPROVIDERDEPT/dept/list HTTP/1.1
2021-10-12 14:33:07.408 DEBUG 13388 --- [p-nio-80-exec-2] n.biancheng.c.service.DeptFeignService   : [DeptFeignService#list] ---> END HTTP (0-byte body)
2021-10-12 14:33:07.983 DEBUG 13388 --- [p-nio-80-exec-2] n.biancheng.c.service.DeptFeignService   : [DeptFeignService#list] <--- HTTP/1.1 200 (574ms)
2021-10-12 14:33:07.983 DEBUG 13388 --- [p-nio-80-exec-2] n.biancheng.c.service.DeptFeignService   : [DeptFeignService#list] connection: keep-alive
2021-10-12 14:33:07.983 DEBUG 13388 --- [p-nio-80-exec-2] n.biancheng.c.service.DeptFeignService   : [DeptFeignService#list] content-type: application/json
2021-10-12 14:33:07.983 DEBUG 13388 --- [p-nio-80-exec-2] n.biancheng.c.service.DeptFeignService   : [DeptFeignService#list] date: Tue, 12 Oct 2021 06:33:07 GMT
2021-10-12 14:33:07.983 DEBUG 13388 --- [p-nio-80-exec-2] n.biancheng.c.service.DeptFeignService   : [DeptFeignService#list] keep-alive: timeout=60
2021-10-12 14:33:07.983 DEBUG 13388 --- [p-nio-80-exec-2] n.biancheng.c.service.DeptFeignService   : [DeptFeignService#list] transfer-encoding: chunked
2021-10-12 14:33:07.983 DEBUG 13388 --- [p-nio-80-exec-2] n.biancheng.c.service.DeptFeignService   : [DeptFeignService#list]
2021-10-12 14:33:07.991 DEBUG 13388 --- [p-nio-80-exec-2] n.biancheng.c.service.DeptFeignService   : [DeptFeignService#list] [{"deptNo":1,"deptName":"开发部","dbSource":"bianchengbang_jdbc"},{"deptNo":2,"deptName":"人事部","dbSource":"bianchengbang_jdbc"},{"deptNo":3,"deptName":"财务部","dbSource":"bianchengbang_jdbc"},{"deptNo":4,"deptName":"市场部","dbSource":"bianchengbang_jdbc"},{"deptNo":5,"deptName":"运维部","dbSource":"bianchengbang_jdbc"}]
2021-10-12 14:33:07.991 DEBUG 13388 --- [p-nio-80-exec-2] n.biancheng.c.service.DeptFeignService   : [DeptFeignService#list] <--- END HTTP (341-byte body)
 ICP备案:
 公安联网备案: