Python下载和安装教程(图解)
Python 是一种跨平台、开源、免费的解释型高级编程语言,由于它能够把用其他语言制作的各种模块轻松地连接在一起,所以 Python 常被称为“胶水”语言。
在近几年某权威机构发布的年度编程语言排行榜中,Python 多次位居第1名,应用范围十分广泛。
图1:Python 图标
Python 有许多版本,到 2020 年 7 月,已升级至 3.8.5。本教程将选用 Python 3.8.5 编程,下面介绍用于 Windows 操作系统的 Python 3.8.5 的下载方式。
Python 3.8.5 有 64 位和 32 位两种,因此先要弄清楚你的 Windows 操作系统是多少位的。方法是:右击“此电脑”图标,在弹出的对话框中单击“属性”菜单项,在弹出的如图2所示的“系统”栏内可以看出这台计算机的操作系统是 64 位的。
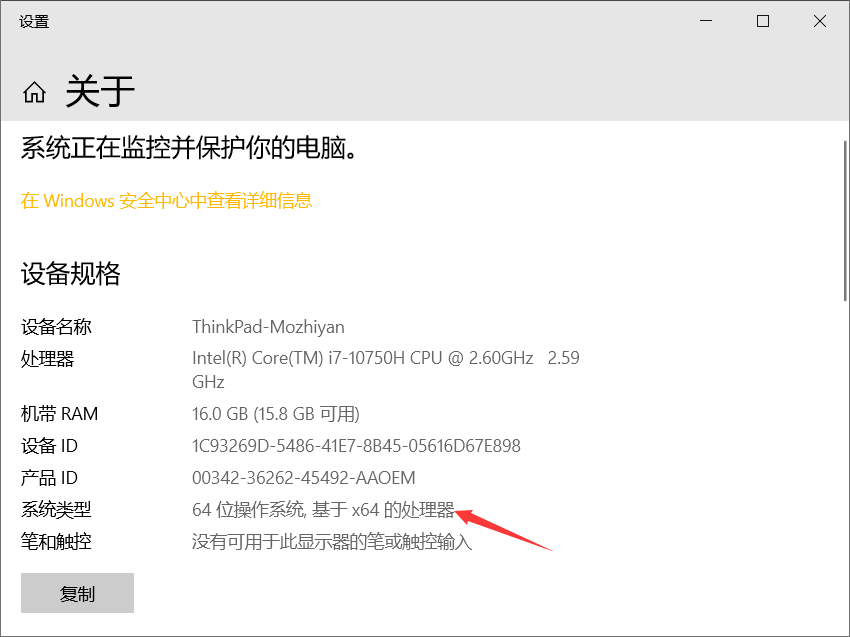
图2:计算机系统信息窗口
打开浏览器,在地址栏内输入 https://www.python.org,按 Enter 键后进入Python官方网站,将鼠标指针移动到 Downloads 按钮上,如图3所示。
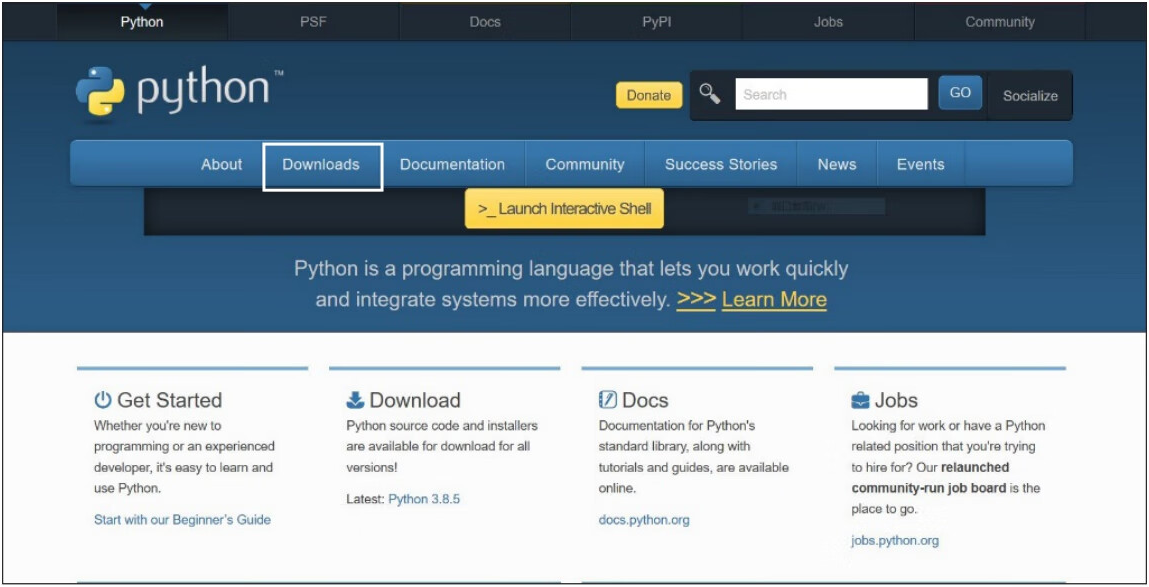
图3:Python下载窗口
单击 Windows 菜单项,进入如图4所示的详细下载列表。
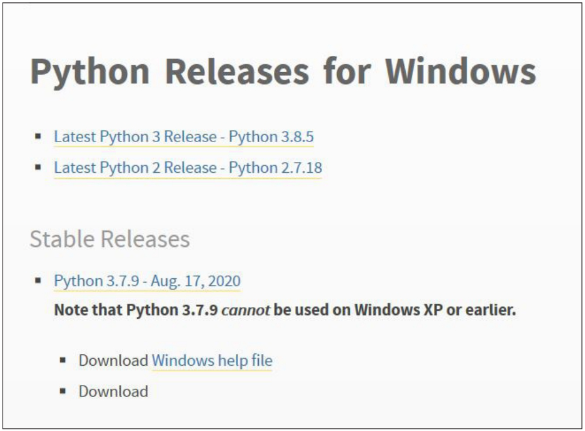
图4:Python 下载列表
在图5中选择箭头所指向的 64 位离线安装文件。
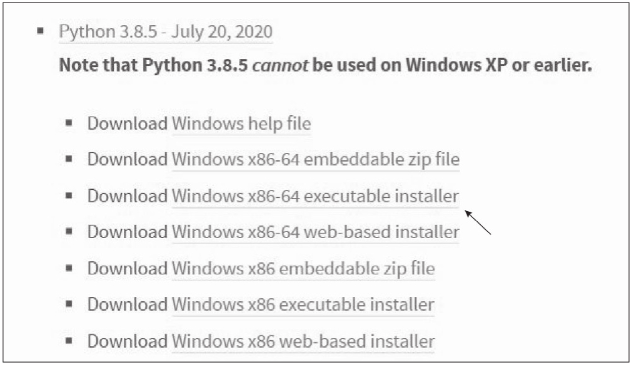
图5:选择 Python 安装文件
下载过程如图6所示。
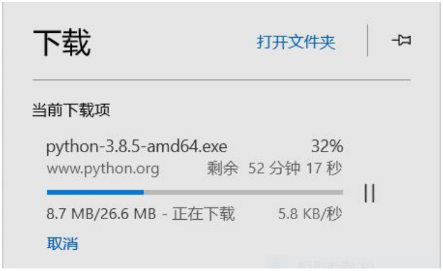
图6:Python 下载过程
下载完成后,双击文件 Python-3.8.5-amd64.exe,将弹出安装向导窗口,选中 Add Python 3.8 to PATH 复选框,让安装程序自动配制环境变量。
为防止操作系统崩溃造成 Python 损坏,不要将 Python 安装在操作系统的系统盘,所以选择如图7箭头所示的 Customize installation,进行自定义安装。
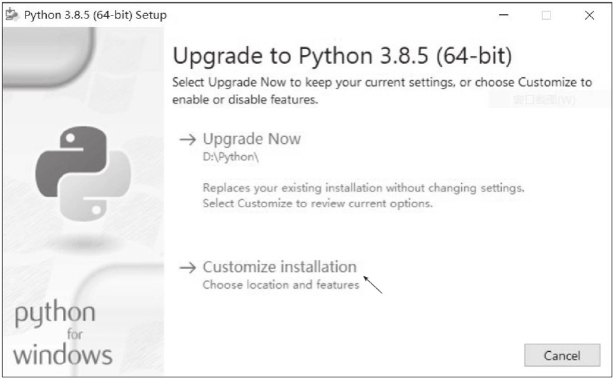
图7:配制环境变量
在弹出的“安装选项”窗口中采用默认设置,如图8所示。
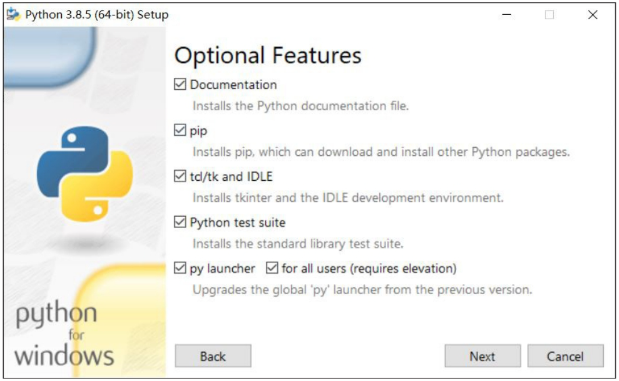
图8:“安装选项”窗口
单击 Next 按钮,打开如图9所示的“高级选项”窗口,在窗口中,设置安装路径为 D:\ Python\。
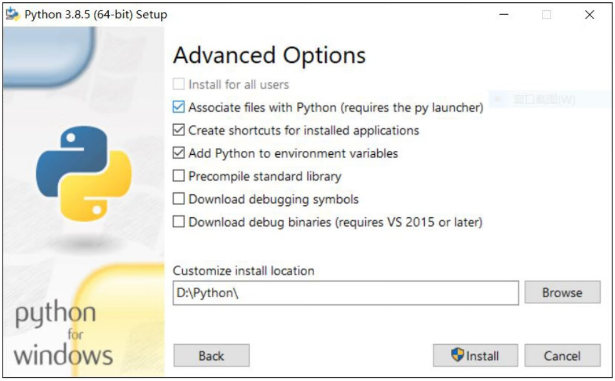
图9:“高级选项”窗口
单击 Install 按钮,安装过程如图10所示。
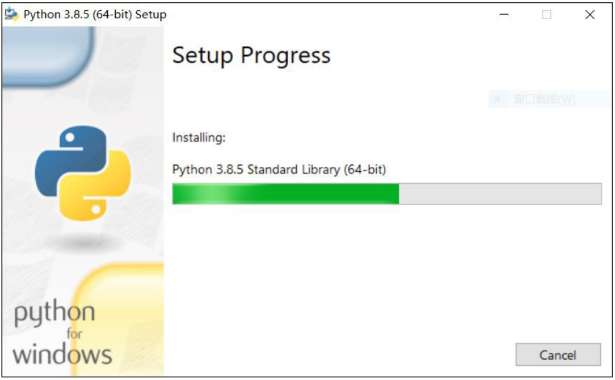
图10:Python 安装过程
安装完成后,将显示如图11所示的窗口,单击 Close 按钮结束安装。
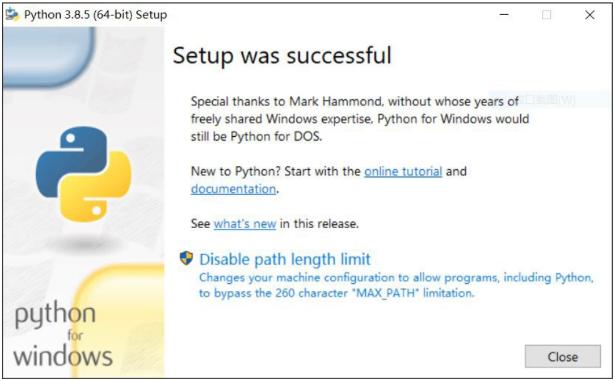
图11:Python 安装结束
安装成功后,桌面会出现如图12所示的图标。

图12:Python 图标
双击 Python 图标,如果出现如图13所示的信息,表明 Python 安装成功,同时也进入交互式 Python 解释器中。
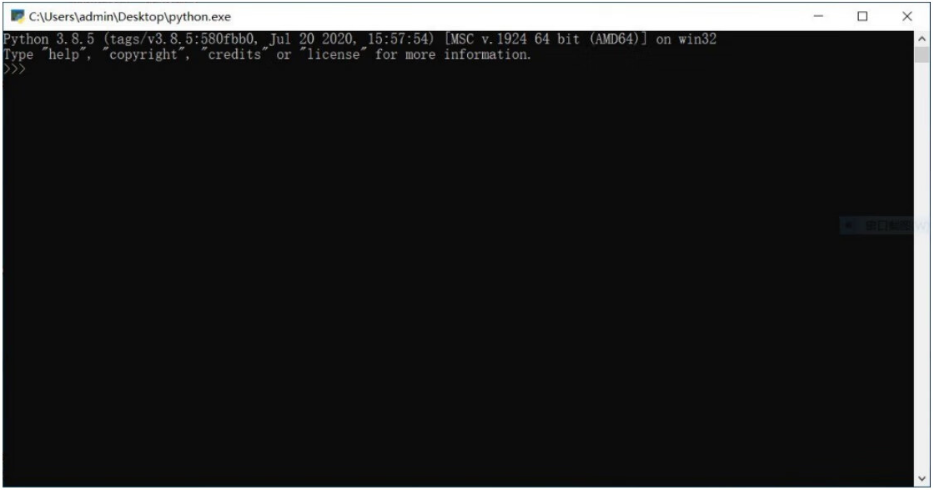
图13:交互式Python解释器
在近几年某权威机构发布的年度编程语言排行榜中,Python 多次位居第1名,应用范围十分广泛。
图1:Python 图标
Python 有许多版本,到 2020 年 7 月,已升级至 3.8.5。本教程将选用 Python 3.8.5 编程,下面介绍用于 Windows 操作系统的 Python 3.8.5 的下载方式。
Python 3.8.5 有 64 位和 32 位两种,因此先要弄清楚你的 Windows 操作系统是多少位的。方法是:右击“此电脑”图标,在弹出的对话框中单击“属性”菜单项,在弹出的如图2所示的“系统”栏内可以看出这台计算机的操作系统是 64 位的。
图2:计算机系统信息窗口
打开浏览器,在地址栏内输入 https://www.python.org,按 Enter 键后进入Python官方网站,将鼠标指针移动到 Downloads 按钮上,如图3所示。
图3:Python下载窗口
单击 Windows 菜单项,进入如图4所示的详细下载列表。
图4:Python 下载列表
在图5中选择箭头所指向的 64 位离线安装文件。
图5:选择 Python 安装文件
下载过程如图6所示。
图6:Python 下载过程
下载完成后,双击文件 Python-3.8.5-amd64.exe,将弹出安装向导窗口,选中 Add Python 3.8 to PATH 复选框,让安装程序自动配制环境变量。
为防止操作系统崩溃造成 Python 损坏,不要将 Python 安装在操作系统的系统盘,所以选择如图7箭头所示的 Customize installation,进行自定义安装。
图7:配制环境变量
在弹出的“安装选项”窗口中采用默认设置,如图8所示。
图8:“安装选项”窗口
单击 Next 按钮,打开如图9所示的“高级选项”窗口,在窗口中,设置安装路径为 D:\ Python\。
图9:“高级选项”窗口
单击 Install 按钮,安装过程如图10所示。
图10:Python 安装过程
安装完成后,将显示如图11所示的窗口,单击 Close 按钮结束安装。
图11:Python 安装结束
安装成功后,桌面会出现如图12所示的图标。
图12:Python 图标
双击 Python 图标,如果出现如图13所示的信息,表明 Python 安装成功,同时也进入交互式 Python 解释器中。
图13:交互式Python解释器
 ICP备案:
 公安联网备案: