OpenCV fillPoly():填充多边形(附带实例)
在 OpenCV 中,用函数 polylines() 可以绘制多边形,还可以用函数 fillPoly() 填充多边形。
fillPoly() 函数的声明如下:
【实例】填充多边形。
运行工程,结果如下图所示:

【实例 2】 通过多边形和线组成图案。
运行工程,结果如下图所示:

fillPoly() 函数的声明如下:
fillPoly(img, pts, color[, lineType[, shift[, offset]]]) -> None各个参数的含义如下:
- img 表示输入的图像;
- pts 表示多边形点集;
- color 表示多边形颜色;
- lineType 表示线段类型;
- shift 表示点坐标中的小数位数;
- offset 表示等高线所有点的偏移。
【实例】填充多边形。
import numpy as np
import cv2 as cv

a = cv.imread("test.jpg")
triangle = np.array([ [10,30], [40,80], [10,90]], np.int32)
cv.fillPoly(a, [triangle],(255,0,0))
cv.imshow("result", a)
cv.waitKey(0)
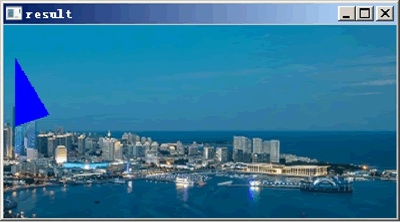
在上述代码中,“[10,30],[40,80],[10,90]”为要填充的轮廓坐标,通过函数 fillPoly() 填充多边形,填充的颜色是蓝色 (255,0,0)。运行工程,结果如下图所示:

【实例 2】 通过多边形和线组成图案。
import cv2 as cv
import numpy as np

W = 400

def my_polygon(img):
    line_type = 8
    # 创建点集
    ppt = np.array([
        [W // 4,  7 * W // 8], [3 * W // 4, 7 * W // 8],
        [3 * W // 4, 13 * W // 16], [11 * W // 16, 13 * W // 16],
        [19 * W // 32, 3 * W // 8], [3 * W // 4, 3 * W // 8],
        [3 * W // 4, W // 8], [26 * W // 40, W // 8],
        [26 * W // 40, W // 4], [22 * W // 40, W // 4],
        [22 * W // 40, W // 8], [18 * W // 40, W // 8],
        [18 * W // 40, W // 4], [14 * W // 40, W // 4],
        [14 * W // 40, W // 8], [W // 4, W // 8],
        [W // 4, 3 * W // 8], [13 * W // 32, 3 * W // 8],
        [5 * W // 16, 13 * W // 16], [W // 4, 13 * W // 16]
    ], np.int32)
    ppt = ppt.reshape((-1, 1, 2))
    cv.fillPoly(img, [ppt], (255, 255, 255), line_type)  # 填充多边形

# 自定义画线函数
def my_line(img, start, end):
    thickness = 2
    line_type = 8
    cv.line(img, start, end, (0, 0, 0), thickness, line_type)  # 画线

rook_window = "res"  # 窗口名称

# 创建黑色的空白图像
size = (W, W, 3)
atom_image = np.zeros(size, dtype=np.uint8)
rook_image = np.zeros(size, dtype=np.uint8)

# 创建凸多边形
my_polygon(rook_image)
cv.rectangle(rook_image, (0, 7 * W // 8), (W, W), (0, 255, 255), -1, 8)

# 画一些线
my_line(rook_image, (0, 15 * W // 16), (W, 15 * W // 16))
my_line(rook_image, (W // 4, 7 * W // 8), (W // 4, W))
my_line(rook_image, (W // 2, 7 * W // 8), (W // 2, W))
my_line(rook_image, (3 * W // 4, 7 * W // 8), (3 * W // 4, W))

# 显示结果
cv.imshow(rook_window, rook_image)
cv.moveWindow(rook_window, W, 200)
cv.waitKey(0)
cv.destroyAllWindows()
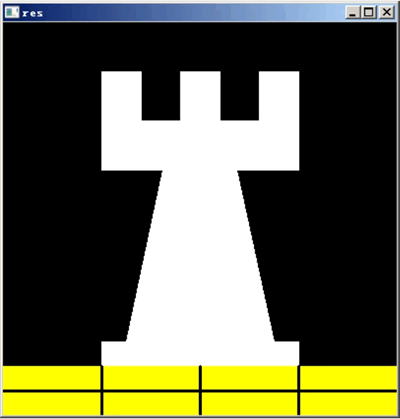
多边形将在 img 上绘制,顶点是 ppt 中的点集,颜色由 (255,255,255) 定义,即白色的 BGR 值。运行工程,结果如下图所示:

 ICP备案:
 公安联网备案: