pyecharts Boxplot类:绘制箱形图(附带实例)
在 Python 程序中,可以通过 pyecharts.charts 模块中的 Boxplot 类绘制箱形图,其语法格式如下:
Boxplot类的相关方法如下:
示例代码如下:
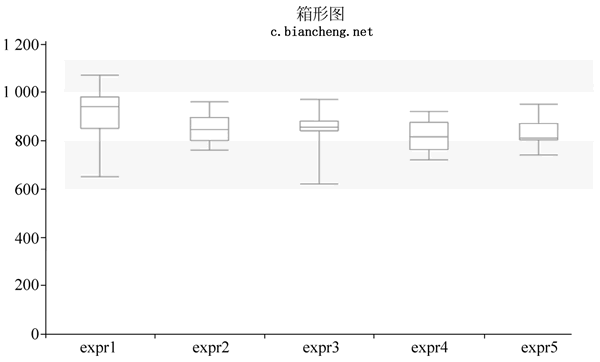
图 1 箱形图
Boxplot(init_opts)其中,参数 init_opts 表示初始化配置项,其值需为 options 模块中的 InitOpts 类。
Boxplot类的相关方法如下:
1) add_xaxis()方法
该方法主要用于添加x轴数据,其语法格式如下:add_xaxis(xaxis_data)其中,参数 xaxis_data 表示 x 轴数据。
2) add_yaxis()方法
该方法主要用于添加y轴数据,其语法格式如下:add_yaxis(series_name,y_axis,markpoint_opts,markline_opts)其中,参数 series_name 表示系列名称;参数 y_axis 表示系列数据;参数 markpoint_opts 表示标记点配置项;参数 markline_opts 表示标记线配置项。
3) prepare_data()方法
该方法可以将指定的数据转换为箱形图的 5 个特征值(最大值、最小值、中位数、上四分位数和下四分位数)所组成的列表,其语法格式如下:prepare_data(items)其中,参数 items 表示数据。
示例代码如下:
from pyecharts.charts import Boxplot
from pyecharts import options as opts
from pyecharts.globals import ThemeType

# 绘制箱形图
boxplot = Boxplot(init_opts=opts.InitOpts(theme=ThemeType.MACARONS))
# 设置图表标题、图例和提示框
boxplot.set_global_opts(
    title_opts=opts.TitleOpts(
        '箱形图', pos_left='center', padding=[10, 4, 5, 90],
        subtitle='c.biancheng.net', item_gap=5, title_textstyle_opts=opts.TextStyleOpts(color='red', font_size=18)
    ),
    legend_opts=opts.LegendOpts(is_show=False),
    tooltip_opts=opts.TooltipOpts(
        trigger='item', trigger_on='mousemove', axis_pointer_type='shadow', background_color='pink'
    )
)

# 数据
data = [
    [850, 740, 900, 1070, 930, 850, 950, 980, 980, 880, 1000, 980, 930, 650, 760, 810, 1000, 1000, 960, 960],
    [960, 940, 960, 940, 880, 800, 850, 880, 900, 840, 830, 790, 810, 880, 880, 830, 800, 790, 760, 800],
    [880, 880, 880, 860, 720, 720, 620, 860, 970, 950, 880, 910, 850, 870, 840, 840, 850, 840, 840, 840],
    [890, 810, 810, 820, 800, 770, 760, 740, 750, 760, 910, 920, 890, 860, 880, 720, 840, 850, 850, 780],
    [890, 840, 780, 810, 760, 810, 790, 810, 820, 850, 870, 870, 810, 740, 810, 940, 950, 800, 810, 870]
]
boxplot.add_xaxis(['expr1', 'expr2', 'expr3', 'expr4', 'expr5'])
boxplot.add_yaxis("", y_axis=boxplot.prepare_data(data))
print(boxplot.prepare_data(data))
boxplot.render('boxplot.html')
上面代码的运行结果如下图所示:图 1 箱形图