Linux部署Nginx的两种方式(非常详细)
在 Linux 环境中安装部署 Nginx 服务,方式有两种:
这两种安装方式在企业中都很常用。
Nginx 源码包的版本选用 1.16.1,这是目前一个较低的版本,装这个低版本的目的是方便在下文演示 Nginx 平滑升级。高低版本之间的编译步骤并没有什么差异,具体步骤如下:
1) 将 Nginx 的源码包及 PCRE 源码包上传至服务器中,并解压。
2) 进入解压后的 Nginx 目录下,通过 configure 关键字和编译选项检测目前操作系统的环境是否支持本次编译安装。
3) 检测操作系统环境无问题后,开始进行编译(make)和安装(make install),这两步可以通过逻辑与(&&)合并执行。
4) 用手动编译的方式安装 Nginx 服务,其目录结构如下:
在 Nginx 服务启动后还会再生成几个临时目录(后缀是 _temp 的目录),这几个临时目录是用来存放临时文件的。
Nginx 的启动命令存放在安装目录的 /sbin/ 文件下,各项命令作用如下:
5) 启动并验证 Nginx 服务。需要先创建用户和组,然后再启动 Nginx 服务。
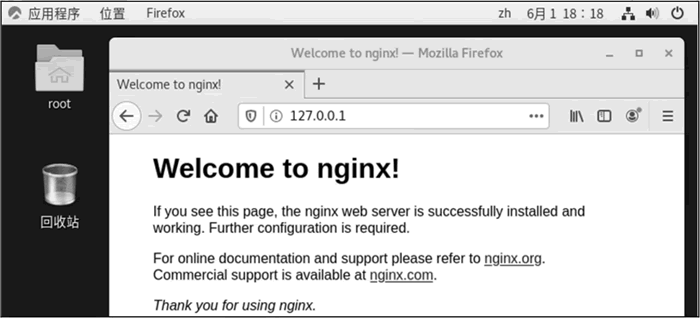
图 1 Nginx欢迎页面
1) 配置 Nginx 的官方 Yum 源仓库。
2) 使用 yum/dnf 命令安装 Nginx 程序。
3) 通过 Yum/DNF 软件包管理器安装 Nginx 服务的目录结构。需要注意的是,通过手动编译和通过 Yum/DNF 软件包管理器安装的 Nginx 目录结构是不同的。
通过 Yum/DNF 软件包管理器安装的 Nginx 服务目录结构见下表。
Nginx 服务安装完成后,可以通过下面的命令进行管理:
4) 启动并验证 Nginx 服务:

图 2 Nginx欢迎页面
至此,通过 Yum/DNF 软件包管理器的方式安装 Nginx 就完成了。
对比这两种安装方式容易发现,手动编译的方式相对灵活一些,功能也可以进行定制;而通过 Yum/DNF 软件包管理器安装的方式更加简单方便。
- 通过手动编译 Nginx 源码包的方式进行安装;
- 通过 Yum/DNF 软件包管理器安装。
这两种安装方式在企业中都很常用。
1、手动编译Nginx源码包
操作系统可以选择 Rocky、CentOS 7 或 CentOS 8,在安装 Nginx 之前,先简单介绍一下常用的编译选项:| 编译选项 | 含义 |
|---|---|
| --prefix= | 指定 Nginx 的安装路径。如果没有指定,默认为 /usr/local/nginx。 |
| --sbin-path= | Nginx 可执行文件的安装路径。只能在安装时指定,若没有指定,默认为 <prefix>/sbin/nginx。 |
| --conf-path= | 指定 Nginx 配置文件的路径。 |
| --error-log-path= | 若 Nginx 配置文件中没有指定错误日志位置,默认错误日志的存放路径。 |
| --http-log-path= | 在 nginx.conf 中没有指定 access_log 指令的情况下,默认的访问日志的路径。 |
| --pid-path= | 指定 Nginx 的 PID 文件路径。若没有指定,默认为 <prefix>/logs/nginx.pid。 |
| --lock-path= | 指定 Nginx 的 lock 文件的路径。 |
| --user= | 指定 Nginx 启动时所使用的用户,在 nginx.conf 中若没有配置 user,默认为 nobody。 |
| --group= | 指定 Nginx 启动时所使用的组,在 nginx.conf 中若没有配置 group,默认为 nobody。 |
| --with-http_ssl_module | 开启 HTTP SSL 模块,使 Nginx 可以支持 HTTPS 请求。这个模块需要提前安装 OpenSSL 服务。 |
| --with-http_flv_module | 启用 ngx_http_flv_module 模块。 |
| --with-http_stub_status_module | 启用 server status 页。 |
| --with-http_gzip_static_module | 启用 gzip 压缩功能。 |
| --http-client-body-temp-path= | 设置 http 客户端请求主体临时文件的路径。 |
| --http-proxy-temp-path= | 设置 http 代理临时文件的路径。 |
| --http-fastcgi-temp-path= | 设置 http fastcgi 临时文件的路径。 |
| --with-pcre= | 指定 PCRE 库的源代码目录,PCRE 库支持正则表达式,可以让我们在配置文件 nginx.conf 中使用正则表达式。 |
Nginx 源码包的版本选用 1.16.1,这是目前一个较低的版本,装这个低版本的目的是方便在下文演示 Nginx 平滑升级。高低版本之间的编译步骤并没有什么差异,具体步骤如下:
1) 将 Nginx 的源码包及 PCRE 源码包上传至服务器中,并解压。
[root@linux opt]# pwd
/opt
[root@linux opt]# ls
nginx-1.16.1.tar.gz  pcre-8.42.tar.gz
[root@linux opt]# tar xf nginx-1.16.1.tar.gz
[root@linux opt]# tar xf pcre-8.42.tar.gz
[root@linux opt]# ls
nginx-1.16.1  nginx-1.16.1.tar.gz  pcre-8.42  pcre-8.42.tar.gz
2) 进入解压后的 Nginx 目录下,通过 configure 关键字和编译选项检测目前操作系统的环境是否支持本次编译安装。
[root@linux opt]# cd nginx-1.16.1/

[root@linux nginx-1.16.1]# ./configure \
> --prefix=/usr/local/nginx \
> --sbin-path=/usr/local/nginx/sbin/nginx \
> --conf-path=/usr/local/nginx/conf/nginx.conf \
> --error-log-path=/usr/local/nginx/log/error.log \
> --http-log-path=/usr/local/nginx/log/access.log \
> --pid-path=/var/run/nginx/nginx.pid \
> --lock-path=/var/lock/nginx.lock \
> --user=nginx \
> --group=nginx \
> --with-http_ssl_module \
> --with-http_flv_module \
> --with-http_stub_status_module \
> --with-http_gzip_static_module \
> --http-proxy-temp-path=/usr/local/nginx/proxy_temp \
> --http-fastcgi-temp-path=/usr/local/nginx/fastcgi_temp \
> --http-uwsgi-temp-path=/usr/local/nginx/uwsgi_temp \
> --http-scgi-temp-path=/usr/local/nginx/scgi_temp \
> --with-pcre=/opt/pcre-8.42

checking for OS
+ Linux 4.18.0-348.el8.0.2.x86_64 x86_64 x86_64
checking for C compiler ... found
+ using GNU C compiler
+ gcc version: 8.5.0 20210514 (Red Hat 8.5.0-3) (GCC)
checking for gcc -pipe switch ... found
-----省略部分内容-----
Configuration summary
+ using PCRE library: /opt/pcre-8.42
+ using system OpenSSL library
+ using system zlib library

nginx path prefix:    "/usr/local/nginx"
nginx binary file:    "/usr/local/nginx/sbin/nginx"
nginx modules path:    "/usr/local/nginx/modules"
nginx configuration prefix:    "/usr/local/nginx/conf"
nginx configuration file:  "/usr/local/nginx/conf/nginx.conf"
nginx pid file:       "/var/run/nginx/nginx.pid"
nginx error log file:    "/usr/local/nginx/log/error.log"
nginx http access log file: "/usr/local/nginx/log/access.log"
nginx http client request body temporary files: "client_body_temp"
nginx http proxy temporary files: "/usr/local/nginx/proxy_temp"
nginx http fastcgi temporary files: "/usr/local/nginx/fastcgi_temp"
nginx http uwsgi temporary files: "/usr/local/nginx/uwsgi_temp"
nginx http scgi temporary files: "/usr/local/nginx/scgi_temp"

[root@linux nginx-1.16.1]#
若在检测过程中报错,找不到编译器,使用以下命令安装编译环境即可。
dnf-y install gcc gcc-c++autoconf automake zlib zlib-devel openssl openssl-devel pcre-devel gd-devel make
示例如下:checking for OS + Linux 4.18.0-305.19.1.el8_4.x86_64 x86_64 checking for C compiler ... not found ./configure: error: C compiler cc is not found [root@linux nginx-1.16.1]# dnf -y install gcc gcc-c++ autoconf automake zlib zlib-devel openssl openssl-devel pcre-devel gd-devel make Rocky Linux 8 - AppStream 4.6 kB/s | 4.8 kB 00:01 Rocky Linux 8 - AppStream 3.2 MB/s | 8.3 MB 00:02 Rocky Linux 8 - BaseOS 4.3 kB/s | 4.3 kB 00:01 Rocky Linux 8 - BaseOS 1.6 MB/s | 2.6 MB 00:01 Rocky Linux 8 - Extras 2.6 kB/s | 3.5 kB 00:01 Rocky Linux 8 - Extras 10 kB/s | 11 kB 00:01 ##注:上面这一段是在检查和更新源仓库 依赖关系解决 ================================================================================ 软件包 架构 版本 仓库 大小 ================================================================================ 安装: gd-devel x86_64 2.2.5-7.el8 appstream 49 k openssl-devel x86_64 1:1.1.1k-6.el8_5 baseos 2.3 M pcre-devel x86_64 8.42-6.el8 baseos 550 k 事务概要 ================================================================================ 安装 30 软件包 升级 26 软件包 总下载: 67 M 下载软件包: (1/56): libXau-devel-1.0.9-3.el8.x86_64.rpm 88 kB/s | 19 kB 00:00 ----省略部分内容---- 完毕!
3) 检测操作系统环境无问题后,开始进行编译(make)和安装(make install),这两步可以通过逻辑与(&&)合并执行。
[root@linux nginx-1.16.1]# make && make install
##注:整个编译安装的过程大约需要 3 分钟

make -f objs/Makefile
make[1]: 进入目录 "/opt/nginx-1.16.1"
----省略部分内容----
make[1]: 离开目录 "/opt/nginx-1.16.1"

[root@linux nginx-1.16.1]# ls /usr/local/nginx/
conf  html  log  sbin
4) 用手动编译的方式安装 Nginx 服务,其目录结构如下:
[root@linux nginx-1.16.1]# cd /usr/local/
[root@linux local]# tree nginx
nginx  #安装目录
├── conf  #存放 Nginx 所有配置文件的目录
│   ├── fastcgi.conf
│   ├── fastcgi.conf.default
│   ├── fastcgi_params
│   ├── fastcgi_params.default
│   ├── koi-utf
│   ├── koi-win
│   ├── mime.types
│   ├── mime.types.default
│   ├── nginx.conf  #主配置文件
│   ├── nginx.conf.default
│   ├── scgi_params
│   ├── scgi_params.default
│   ├── uwsgi_params
│   ├── uwsgi_params.default
│   └── win-utf
├── html  #专门存放网站的目录
│   ├── 50x.html
│   └── index.html
├── log  #Nginx 默认存放所有日志文件的目录
└── sbin  #存放 Nginx 命令的目录
    └── nginx  #Nginx 的启动命令
在 Nginx 服务启动后还会再生成几个临时目录(后缀是 _temp 的目录),这几个临时目录是用来存放临时文件的。
Nginx 的启动命令存放在安装目录的 /sbin/ 文件下,各项命令作用如下:
- nginx-t:验证 Nginx 配置文件是否配置正确,无法验证其他文件的情况。
- nginx-s reload:重新加载 Nginx 服务,常用于在改变配置文件后使其生效。
- nginx-s stop:快速停止 Nginx 服务。
- nginx-s quit:正常停止 Nginx 服务。
- nginx-V:查看 Nginx 程序的版本号。
- nginx-c nginx.conf:启动 Nginx 服务,在启动时指定配置文件。指定配置文件路径时可以使用绝对路径,也可以使用相对路径。
5) 启动并验证 Nginx 服务。需要先创建用户和组,然后再启动 Nginx 服务。
[root@linux nginx]# pwd  #当前所在位置
/usr/local/nginx

[root@linux nginx]# groupadd -r -g 311 nginx && useradd -r -g 311 nginx
#创建 Nginx 用户和组,并在创建时指定 gid 和 uid,指定 id 这一步可以省略。

[root@linux nginx]# ./sbin/nginx -t #验证 Nginx 配置文件是否配置正确
nginx: the configuration file /usr/local/nginx/conf/nginx.conf syntax is ok
nginx: configuration file /usr/local/nginx/conf/nginx.conf test is successful

[root@linux nginx]# ./sbin/nginx -c conf/nginx.conf #启动 Nginx 服务
[root@linux nginx]# ls
client_body_temp  conf  fastcgi_temp  html  log  proxy_temp  sbin  scgi_temp  uwsgi_temp
[root@linux nginx]# netstat -anpt | grep 80  #Nginx 默认占用 80 端口
tcp        0      0 0.0.0.0:80              0.0.0.0:*               LISTEN      66284/nginx: master
访问地址 127.0.0.1,查看 Nginx 服务启动后的欢迎页面,如下图所示:
图 1 Nginx欢迎页面
2、通过Yum/DNF软件包管理器安装
过这种方式安装是最简单的,只需要执行几条命令即可。现在将虚拟机回退一下快照,具体安装步骤如下:1) 配置 Nginx 的官方 Yum 源仓库。
[root@linux ~]# vim /etc/yum.repos.d/nginx.repo
[nginx-stable]
name=nginx stable repo
baseurl=http://nginx.org/packages/centos/$releasever/$basearch/
gpgcheck=1
enabled=1
gpgkey=https://nginx.org/keys/nginx_signing.key
module_hotfixes=true

[nginx-mainline]
name=nginx mainline repo
baseurl=http://nginx.org/packages/mainline/centos/$releasever/$basearch/
gpgcheck=1
enabled=0
gpgkey=https://nginx.org/keys/nginx_signing.key
module_hotfixes=true
2) 使用 yum/dnf 命令安装 Nginx 程序。
[root@linux ~]# dnf install nginx
#初次执行时会在 Yum 源中下载元数据,需要等待几分钟
#也可以使用 yum install nginx,这两条命令都能用。若是在 CentOS 8 中,建议用 dnf 命令安装

依赖关系解决
================================================================================
软件包        架构         版本                     仓库             大小
================================================================================
安装:
nginx         x86_64       1:1.20.2-1.el8.ngx      nginx-stable     820 k

事务概要
================================================================================
安装  1 软件包

----省略部分内容----

已安装:
nginx-1:1.20.2-1.el8.ngx.x86_64

完毕!
Nginx 服务已被安装到操作系统中。
3) 通过 Yum/DNF 软件包管理器安装 Nginx 服务的目录结构。需要注意的是,通过手动编译和通过 Yum/DNF 软件包管理器安装的 Nginx 目录结构是不同的。
通过 Yum/DNF 软件包管理器安装的 Nginx 服务目录结构见下表。
| 文件路径 | 类 型 | 作 用 |
|---|---|---|
| /etc/nginx/ | 目录 | |
| /etc/nginx/conf.d | 目录 | |
| /etc/nginx/conf.d/default.conf | 默认配置文件模板 | Nginx 主配置文件 |
| /etc/nginx/nginx.conf | 主配置文件 | |
| /etc/nginx/fastcgi_params | 配置文件 | cgi 相关的配置,fastcgi\scgi\uwsgi 的相关配置文件 |
| /etc/nginx/scgi_params | 配置文件 | |
| /etc/nginx/uwsgi_params | 配置文件 | |
| /usr/sbin/nginx | 命令 | Nginx 服务启动和管理的终端命令 |
| /usr/sbin/nginx-debug | 命令 | |
| /usr/share/nginx/html | 网站根目录 | 网站默认存放的位置 |
| /var/cache/nginx | 目录 | Nginx 的缓存目录 |
| /var/log/nginx | 目录 | Nginx 的日志目录 |
Nginx 服务安装完成后,可以通过下面的命令进行管理:
- systemctl start nginx:启动 Nginx 服务;
- systemctl stop nginx:停止 Nginx 服务;
- systemctl reload nginx:重载 Nginx 服务;
- nginx-t:检查配置文件;
- systemctl enable nginx:设置为开机自启动。
4) 启动并验证 Nginx 服务:
[root@linux ~]# systemctl start nginx
[root@linux ~]# netstat -anpt | grep 80
#Nginx 默认占用 80 端口
tcp        0      0 0.0.0.0:80              0.0.0.0:*               LISTEN       33424/nginx: master

[root@linux ~]# ps -ef | grep nginx
#Nginx 服务在启动时默认启动 1 个 master 进程和 4 个 worker 进程
root      31595     1  0 18:28 ?        00:00:00 nginx: master process /usr/sbin/nginx -c /etc/nginx/nginx.conf
nginx     31596  31595  0 18:28 ?        00:00:00 nginx: worker process
nginx     31597  31595  0 18:28 ?        00:00:00 nginx: worker process
nginx     31598  31595  0 18:28 ?        00:00:00 nginx: worker process
nginx     31599  31595  0 18:28 ?        00:00:00 nginx: worker process
出现如下图所示欢迎页面:
图 2 Nginx欢迎页面
至此,通过 Yum/DNF 软件包管理器的方式安装 Nginx 就完成了。
对比这两种安装方式容易发现,手动编译的方式相对灵活一些,功能也可以进行定制;而通过 Yum/DNF 软件包管理器安装的方式更加简单方便。